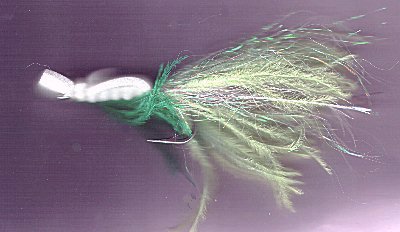
GURGLER
Hook: Daiichi #2546--SS--5/0----or Partridge any other good quality saltwater hook.
Foam: Various colors of 1/8 inch fly foam in 4x8" sheets or 5x5" sheets. Note: I use a small carpenters level and square to cut the sheets with a razor into 9/16th" strips five inches long.
Thread: I like a strong thread such as Big Fly or Flymaster Plus in the appropriate color.
Tail: I use a variety of materials for color and flash and light weight. I really like Ostrich Herl and Awesome Hair along with what ever other flash I have that seems to work.
Whiskers: I really like Calves Tail but I will use what ever is on the bench and sometimes none at all. I also use a wrap of Chenille over the segmented body of the foam ---also in various colors and sizes.
Eyes: I like eyes but one hookup and they are probably history---still they look neat and I attach them with "Zap A Dap Goo". In fact I use a lot of it in making this fly. Love the stuff ! Again some fly have eyes and some do not it just depends on how I feel about each fly.
Procedure:
- Wrap the hook shank with a good cover of thread back to the barb.
- Apply some Zap A Gap over the length of the shank.
- Cut about 5" of 30lb.test mono , make a small loop and tie it on to the back of the hook with the two cut ends held to the side of the shank and wrap the thread tightly around those tag ends. The Zap Goo will secure the mono very nicely. The mono loop should curve up and it is used to support the tail and keep it from fouling in the hook when casting......A really neat technique for lots of big fly's.
- Now tie in all the materials you want to use for the tail. I usually begin with some white Deer tail for stiffness and build on that.
- You are now ready to tie in the foam strip. Again, I add a little Zap to the tail material that I tied in along the shank as an extra precaution against the foam rolling on the hook shank. Tie one end of the foam strip near the hook eye and holding the foam around the shank,tie 1/4" segments back to the end of the shank insuring that you are back far enough to cover the tie in point of the tail and then wind back over those exact spots to the eye of the hook.
- Apply some more Zap Goo to the top of the exposed segments and lay the remaining strip
material right over the top and tie it off at the hook eye. I always tie a 1/4" segment right there by moving the thread back up the shank and take a few turns over both wraps.
- At this point, it's time to decide if you wish to use some Chenille as an additional body wrap. If so, move your thread back to the rear of the shank by rewinding back over the foam segments and tie in the Chenille' Wind the thread forward to the hook eye again and then wind the Chenille forward in the segmented grooves. Tie the Chenille off at the hook eye.
If you have decided to just use some Calf Tail or other material as whiskers----just tie it in at this time.
- You now have the remaining foam strip--about 2 1/2"--- extending out over the eye of the hook. At this point you need to decide whether you want a Rolled Head or a Flap Head. A rolled head makes attaching doll eyes easy because it provides the ideal area to glue them on. The Flap Head requires you to cut off the extra foam material about 5/8" from the hook eye and then applying some Zap Goo to the small piece and laying it right on top of the remaining foam tying it down right over the two segments.
- Zap goo sets up pretty fast but it is very forgiving----for awhile---- This extra foam "cap" provides the rigidity and extra floatation needed for this fly. The "Gurgler" gets it's name from the sound it makes when it is pulled across the surface of the water and so a "stiff upper lip" is needed to catch the water or a big rolled nose will do the same thing.
Well Folks that's the best description I can provide.....Happy Fishing.....Doyle T. Sowerby
